Sorry, this is probably a really easy one for you guys, but I have spent quite awhile trying to figure it out.
I downloaded the student schedule template provided by Microsoft. Link: Student schedule
I don't actually want to use it as a student schedule, but instead a daily schedule of tasks for myself, but that is irrelevant.
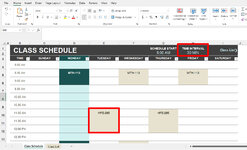
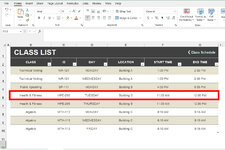
When I put in a time (doesn't matter the increment), it will always spill over into the next time. For instance, if you put it as 30 minute increments up at the top, on the default information listed, it will put the default listed Health & Fitness class lasting for three 30 minute increments (until 12:30, when it only should go to 12:00). I can fix it by subtracting 1 minute (or even 1 second). For instance, in the default example, if it is changed to 11:59, it will display correctly.
Can anyone figure out how to fix it so that it will display correctly as listed?
Thank you very much for any help that anyone feels they might be able to give.
Here are a couple screenshots with red boxes around the relevant example I described above. (this information is in the default template above at the Microsoft link)


