Using XML In Excel
December 10, 2002 - by Bill Jelen
Everyone is saying that XML is the most important new feature in Office 2003. But, unless you happen to be in a company with tons of XML schemas floating around, you probably haven't been able to figure out how to duplicate that cool demo you saw Microsoft do during the Office 2003 launch. For those of you who subscribe to Woody's newsletter, you now realize that Woody is going to serialize the explanation of XML, making us wait 4 weeks (or more) to get the whole story. So, before Woody can ever get to the point, I am going to walk through a long tip explaining how to make full use of XML in Office 2003.
The Great Promise
Microsoft says that you can now store data as XML and easily re-purpose the data. Open the same data file and it looks one way in Excel, open the data file and it looks another way in Word. It is very powerful. We also have the fact that since Office 2003 considers XML to be a native file format, anyone with any programming language can write native XML files. If you have QBasic or Rexx or anything, you can now create XML Excel (ExcelML?) files on the fly.
Only in Excel Professional
We are now faced with a class system in Office 2003. Full XML support is not available in these editions: (Codes in italics stand for where you can buy each: R=Retail, P=Preinstalled with new Computer, V=Volume-Licensing, A=Academic Licensing, S=School Resellers).
- Microsoft Office Small Business Edition 2003 (R, P, V, A)
- Microsoft Office Standard Edition 2003 (R, V, A, S)
- Microsoft Office Basic Edition 2003 (P)
- Microsoft Office Student and Teacher Edition 2003 (R, S)
Full XML support is available in these editions:
- Microsoft Office Professional Edition 2003 (R, P, V, A, S)
- Microsoft Office Professional Enterprise Edition 2003 (includes InfoPath)(V)
- Microsoft Excel 2003 (R)(The stand-alone Excel box is considered to be professional)
If you are unlucky enough to have one of the "lesser" versions of Office 2003, your cheapest upgrade path might be to buy the retail box version of Excel. Unless you work in a corporate environment, The only way to get InfoPath (the new tool that lets you create forms and XML Schemas) is to buy the retail box version.
What is XML? Is it like HTML?
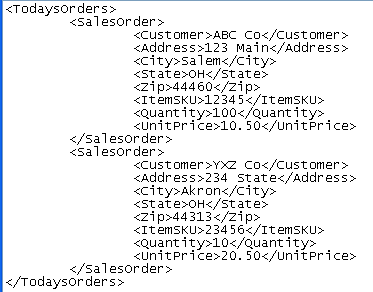
XML stands for Extensible markup language. If you've ever looked at the "View Source" view of a webpage in Notepad, you are familiar with the structure of XML. While HTML allows for certain tags, like TABLE, BODY, TR, TD, XML allows for any tags. You can make up any sort of a tag to describe your data. Here is a screenshot of some XML data that I typed into notepad:
Here are some simple rules about XML:
- Every bit of data has to start and end with an identical tag: <tagname>Data</tagname>
- Tag names are case sensitive. <customer> and </customer> are NOT valid tags because the capitalization in the end tag is not the same as the capitalization in the begin tag.
- The XML file must begin and end with a root tag. There can only be one root tag in a file. In the example above, the root tag is <todaysorders>.
- You can have an empty tag - put the slash at the end of the tag instead of the beginning: <tagname></tagname>
- If you nest tags, you must close the inner tag before closing the outer tag. While HTML will allow this structure, <b>click <i>Cancel</i></b> this is not valid in XML. <item><a>data</a></item> will work, but <item><a>data</a></item>will not.
Alphabet Soup: Three File Types
Here are the three files we will encounter when working with XML.
- .XML is the data file shown above
- .XSD is an XML Schema definition. This is an all-important file. Data relationships are defined here. Data validation is defined here as well. In order to actually do the Microsoft demo, you need an XML Schema file. While anyone can type XML into notepad, we need a schema in order to do anything cool. I will show you how to create one below.
- .XSL is an XML StyleSheet Language file - these allow you to repurpose the data from one format to another.
By far, the biggest hurdle is how to create the Schema file. You can open an XML file in Excel but you can not do any transforms without a schema. Luckily, Excel will create a default schema for you, but it is NOT obvious how to use the schema. Let's walk through the steps.
-
Open a blank Notepad. Copy this data from below and paste it into Notepad. Save the file as test.xml.
<todaysorders> <salesorder> <customer>ABC Co</customer> <address>123 Main</address> <city>Salem</city> <state>OH</state> <zip>44460</zip> <itemsku>12345</itemsku> <quantity>100</quantity> <unitprice>10.50</unitprice> </salesorder> <salesorder> <customer>YXZ Co</customer> <address>234 State</address> <city>Akron</city> <state>OH</state> <zip>44313</zip> <itemsku>23456</itemsku> <quantity>10</quantity> <unitprice>20.50</unitprice> </salesorder> </todaysorders> - In Excel, use File - Open. If the "Files of type:" box is set to All Microsoft Excel files, you will see test.xml. Click Open.
-
You are first presented with the Open XML dialog box. Later, we will want to use the powerful XML Source task pane, but we can not do that until we have a valid schema. For right now, choose to open as an XML list.
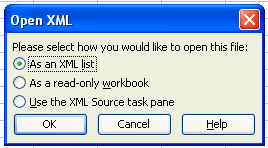
Open XML Dialog Box -
Next - we get the information box that the XML does not have a schema. This is a fantastic message - because Microsoft is now going to create a schema for you on the fly.

Schema Warning Message -
Here is our data in Excel. It is pretty cool. They turn on the awesome new Excel 2003 List feature (usual shortcut: Ctrl+L). With the List feature turned on, we have autofilters on every column and an Access-like asterisk row for adding new data.

XML Data in Excel Worksheet -
Now - here is the undocumented trick. A tip of the hat to Microsoft's Excel XML guru Chad Rothschiller for showing us this cool trick. Start the Visual Basic Editor with Alt+F11. In the Visual Basic Editor, hit Ctrl+G to open the immediate pane. In the immediate pane, type:
Print ActiveWorkbook.XmlMaps(1).Schemas(1).Xml
Immediate Window in VBE Remember the message in #4? Microsoft offered to build a schema on the fly for us. This little bit of code above will print the schema. Click enter and the schema will print in the immediate pane.

Schema in the immediate pane Open a blank notepad, copy the data from the immediate window and paste into the blank notepad. You can now see the complete schema for our simple dataset.

Save Schema File You can now save the notepad file as TodaysOrders.xsd
- Go back to Excel and close the test dataset.
-
From Excel, open test.xml again. This time, indicate that you want to use the XML Source task pane and then click OK to the Schema information box.
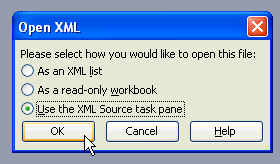
Choose Opening Option of XML Source -
You now get a blank worksheet, but the XML Source pane on the right lists all of the available fields.
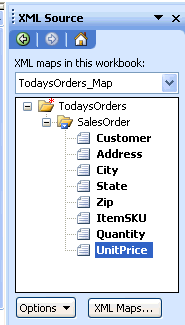
XML Source Pane -
Choose the Options dropdown and select Preview data to see a sample of each element in the task pane.
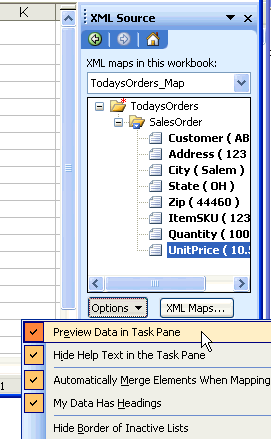
Preview Data in Task Pane -
Add a nicely formatted title to your blank spreadsheet. Drag the Sales Order element and drop it in cell B6.

Drag and Drop Data Element - If you don't see the list toolbar, choose View - Toolbars - List to show the toolbar.
-
From the toolbar, select Refresh XML Data
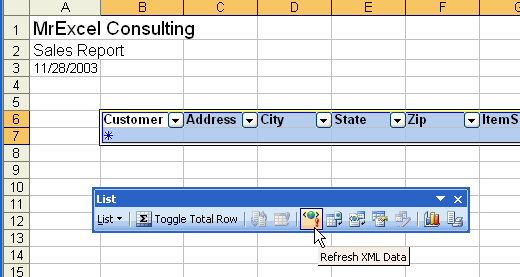
Refresh XML Data Button -
The sample XML data that we typed above is added to the spreadsheet.

Result XML Data on the Worksheet - Save the workbook as a regular Excel file, perhaps called OrderReport.xls
Refreshing Data Daily
If you can get your system to start writing out daily orders each day to Test.XML, then you are all set. Open OrderReport.xls, refresh the XML data, and you will have a nicely formatted report of your XML orders each day. This is pretty powerful - I set up the formatting once, open the file each day, click Refresh and I have a nicely formatted report with the data from the XML set.

Using Excel to Create XML Data
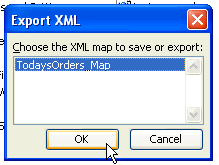
Can we use Excel to create new XML data? Now that we have a schema defined, yes we can! To our existing spreadsheet, we can have our telephone order-takers add new data to the Excel file throughout the day. At the end of the day, use File - SaveAs. Choose to save is as type: XML Data.

Confirm which map to use:
Repurposing the Data in Word
Now that we've created a schema and data, let's open the data in Microsoft Word 2003. After opening TestAsData.xml in Word 2003, we get the default data view in Word.
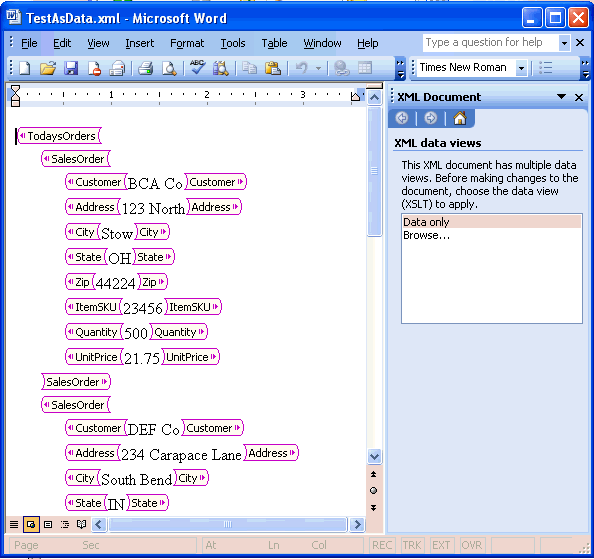
You can format this document:
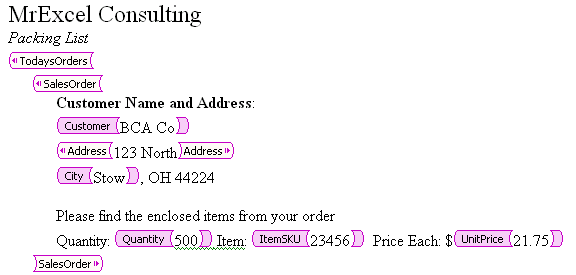
Hit Ctrl + Shift + X to toggle the fields off:
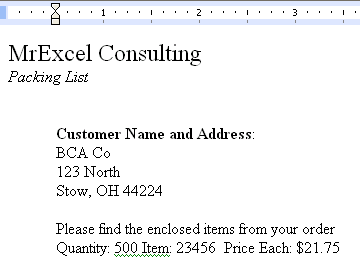
Using XSL Views to Repurpose Data
The above example using Drag and Drop does not actually create a Transform. If you create Transform files, you can easily transform the XML data into different views in Word. This is where the real power comes in. Before I show you how to create your own transform, let's walk through how Microsoft set up the demo in the Office 2003 rollout.
To try this on your copy of Word 2003, download XML Sample Package. The zip file contains:
- One XML file: SampleMemo.xml
- One schema: Memo.xsd
- Three transform files: elegant.xsl, professional.xsl, contemporary.xsl
Follow these steps:
- Boot Word 2003
-
From the menu, select Tools - Templates and Add-Ins...
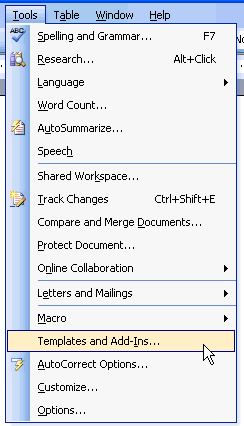
Templates and Add-Ins -
Click the XML Schema Tab and select Add Schema...
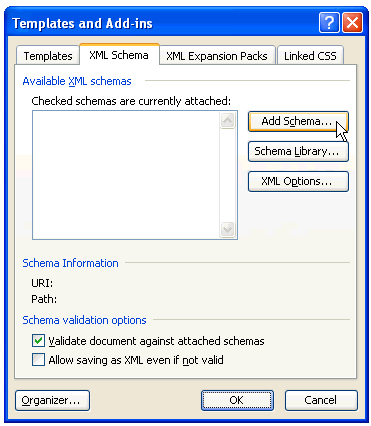
XML Schema Tab -
Navigate to where you unzipped the sample files. Select Memo.xsd and click Open.
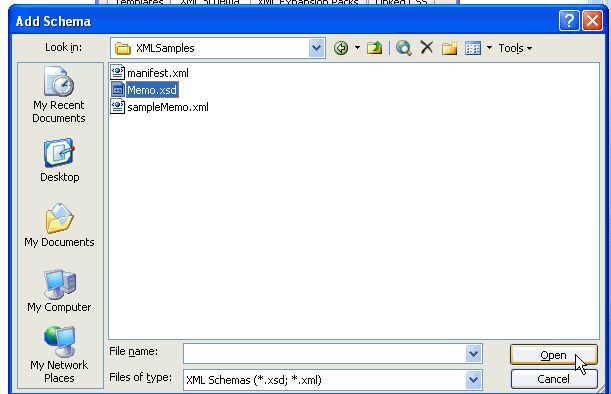
Selecting XSD File to Add a Schema -
In the Schema Settings dialog, give the schema a friendly name in the Alias box. Maybe something like "Memo". Click OK.
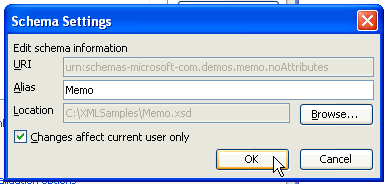
Add an Alias to the Schema At this point, Word is now aware of the memo schema. Next we have to make Word 2003 aware of the Transforms. Note that Microsoft calls these "solutions".
-
You still should be on the Templates and Add-ins dialog. Click Schema Library...
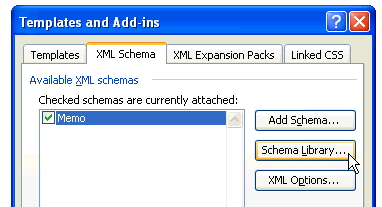
Schema Library - In the Schema Library dialog, select Memo in the top listbox. This will enable the button in the lower part of the dialog for "Add Solution...".
-
Click Add Solution button.
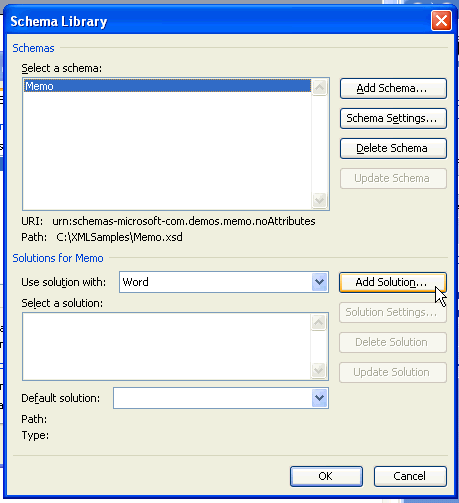
Adding Solution -
Navigate to the folder with your .xsl files. Choose Contemporary.xsl and click Open.
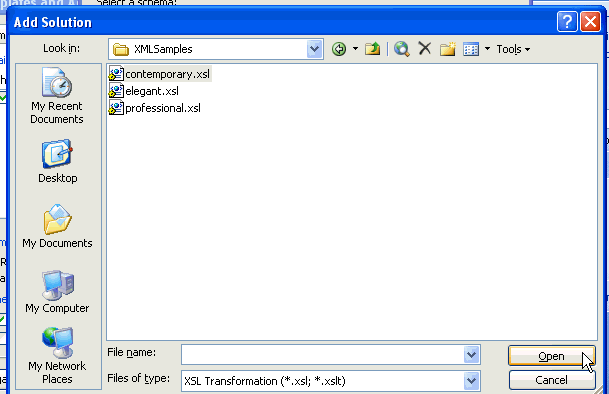
Select Transform File -
In the Solution Settings dialog, give the transform file a friendly name, such as "Contemporary". Click OK.
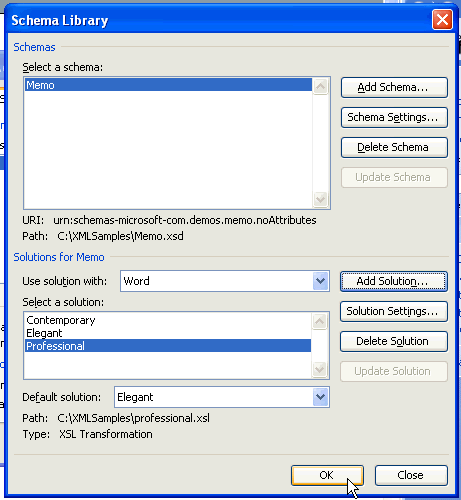
Alias for the Transform File -
Repeat steps 8 through 10 to add Elegant.xsl and Professional.xsl. Click OK to close the schema libary. Click OK to close Templates and Add-Ins.
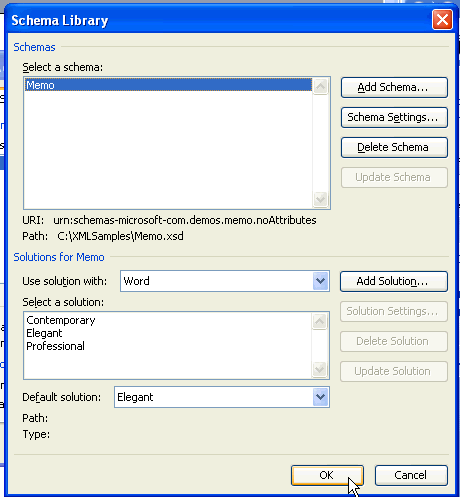
Finalize Schema Library At the Microsoft demo, all of these 11 steps were done behind the scenes. The public walked in and we watched as they showed us these steps.
-
We are going to open SampleMemo.xml in Word. Here is the notepad view of this file. It is plain XML data without any formatting.
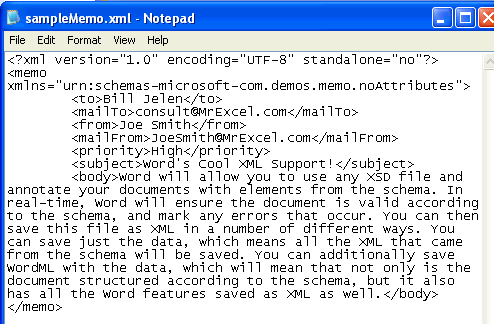
Sample XML Data File Content -
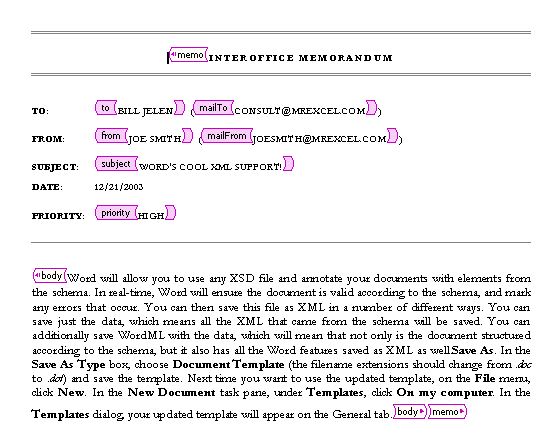
From Word, open SampleMemo.xml. Behind the scenes, Microsoft scans the XML file to find that this is data using the Memo schema. It looks in the schema library to see if there is a match on the "memo" schema. When there is, it finds all of the XSL solutions that we've added. Since we have three, Word selects one to display, then offers us the others in the XML Document task pane. This is very amazing.
Here is the XML data views Pane:
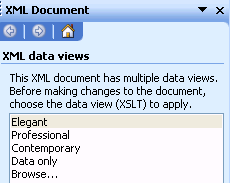
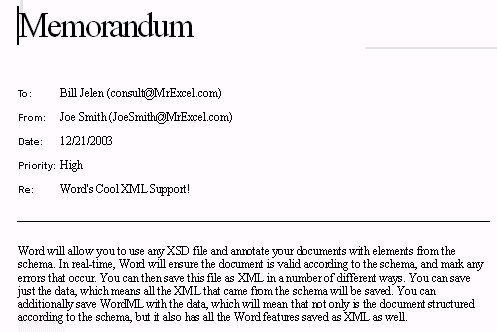
XML Data Views Pane Here is the default view of the data (this is using the Elegant xsl).
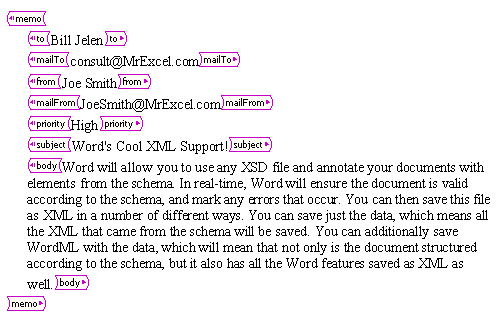
Default View of the Data Click on Data Only and you get just the data without formatting.
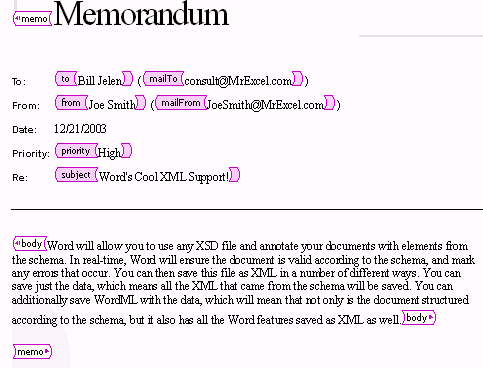
Data Only View Click on Contemporary, and a few seconds later, you have a totally different formatted view of the data:
Formatted View of the Data -
You can show/hide the purple XML tags with Ctrl+Shift+X.
Show/Hide XML Tags
Creating Your Own XSL Transform Files
I can see the power. But so far, we've only used downloaded XSL files for someone else's data. We really need a way to create an XSL file for our own data. Again, if you work for a company who is XML-Rich, someone probably already has these transforms set up. However, if you are the first person in your company to try the XML stuff, then you have to go through the relatively painful task of setting up your own transform files.
Here is how we are going to do this. First, I am going to create a fancy document in Word that shows how I want to display the XML data. I will put in easy-to-find placeholders where I want the XML fields to go. I will save this document as Word XML. Then, using Notepad, I am going to edit the document, paste in some XSL code, and save the file. This should create a custom XSL transform file.
-
In Word, build a nicely formatted sample. Below, I have built an Order confirmation. This has a logo, introductory text, the fields from the XML file and closing text. I've used various fonts and colors. The convention of using *** to highlight the fields is simply to help me as I look through the Word XML file in Notepad.
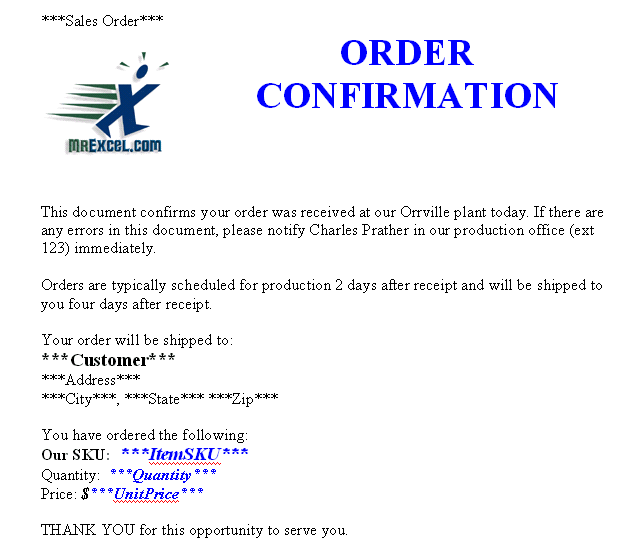
Template in Word -
I will save this file as Word XML.

Saving as Word XML - I will open two notepad windows. One has Sales Order.xml and the other has an existing elegant.xsl tranform code. (to be continued).
