Make A Personal Macro Workbook
May 05, 2021 - by Bill Jelen
Challenge: Macros stored in the Personal Macro Workbook are always at your disposal. You can run the macros on any workbook that you open on the computer. Also, you do not have to jump through security hoops to run macros stored in the Personal Macro Workbook.
If you have never used the Personal Macro Workbook, it does not exist on your computer. You need to create one.
Solution:
For Excel 2003 and Earlier
In Excel 2003 or an earlier version of Excel, open any workbook. Choose Tools, Macro, Record New Macro.
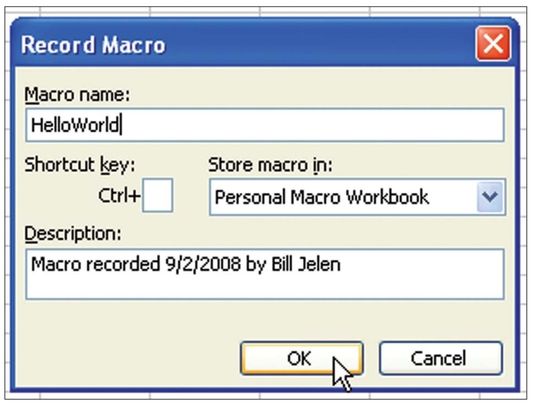
In the Macro Name field, type HelloWorld (without a space). Open the Store Macro In dropdown and choose Personal Macro Workbook. Leave the Shortcut Key field blank. There is no need to change the Description field for this tiny macro. The dialog should appear as in Figure 97. Click OK.
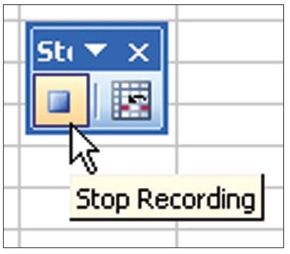
When you click OK, the macro recorder runs. You have to do at least one action in Excel that is recordable. Perhaps you can press Ctrl+B to bold the current cell or type Hello in the current cell. After you have performed this action, you can stop recording. The reliable way to stop recording is to choose Tools, Macro, Stop Recording. You might also see the Stop Recording button on the tiny Stop Recording toolbar (Figure 98).
When you’ve recorded a macro, Excel creates the Personal Macro Workbook. On my Windows XP computer, the file is stored in C:\Documents and Settings\Bill\Application Data\Microsoft\Excel\XLSTART\Personal.xls.
The Personal Macro Workbook is a hidden workbook. There is nothing special about the workbook. If you are curious, you can unhide it by selecting Window, Unhide and then selecting PERSONAL.XLS and clicking OK. It should contain one worksheet and will be completely blank. All the good stuff in the Personal Macro Workbook is visible from the VBA editor.
To see the code pane in the Personal Macro Workbook, follow these steps:
- Press Alt+F11 or select Tools, Macro, Visual Basic Editor. If you have never used macros before, you see a menu bar, a toolbar, and a lot of gray.
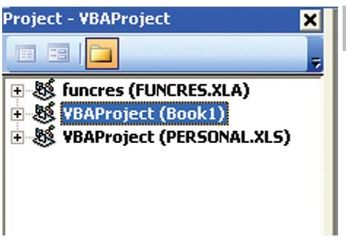
- Press Ctrl+R or select View, Project Explorer to show the Project Explorer pane. As shown in Figure 99, the Project Explorer lists each open workbook, plus one workbook for each standard add-in installed on your computer. Figure 99 shows the workbooks in collapsed mode. You might find that some of your workbooks have been expanded to show worksheets and modules.
- Use the + sign next to PERSONAL.XLS to expand the tree view. Click the + sign next to Modules to see a list of modules. If you just recorded your first macro, you see only Module1. If you record more macros, Excel adds new modules such as Module2, Module3, and so on (Figure 100).

Figure 100. You double-click a module name to see the code in that module. - To see the code in any module, double-click the module in Project Explorer. Alternatively, right-click the module and choose View Code.
If you want to run a macro from this book, you can type or paste it in any existing module in PERSONAL.XLS. Note that after you change code in PERSONAL.XLS and then you close Excel, you are prompted about whether you want to save your changes to PERSONAL.XLS. Don’t forget to save at this point!
For Excel 2007
In Excel 2007, follow these steps:
- Open any workbook in Excel 2007.
- Look near the lower-left corner of the Excel window. To the right of the word Ready in the status bar is the Record Macro icon. Click it (Figure 101). Excel displays the Record Macro dialog.

Figure 101. The Record Macro icon is one of the few icons outside the ribbon. - In the Record Macro dialog, enter a macro name, such as HelloWorld (no spaces). Leave the Shortcut Key field blank. Change the Store Macro In dropdown to Personal Macro Workbook. Leave the Description field blank. Click OK (Figure 102).

Figure 102. Choose to create this macro in the Personal Macro Workbook. - Perform one action that the macro recorder can record. Perhaps you can press Ctrl+B to bold the current cell or type Hello in the current cell.
- Stop the macro recorder by pressing the square icon in the lower-left corner of the window, near the word Ready in the status bar (Figure 103). This icon and the Record Macro icon share the same location; the Stop Recording icon replaces the Record Macro icon while you are recording.
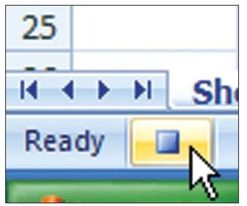
Note: You can also record a macro by selecting View, Macros, Record Macro or Developer, Record New Macro. The Stop Recording button is found in these same locations while you are recording a macro.
The Personal Macro Workbook is a hidden workbook. There is nothing special about the workbook. If you are curious, you can unhide it with the Unhide command on the View tab. It should contain one worksheet and will be completely blank. All the good stuff in the Personal Macro Workbook is visible from the VBA editor.
To see the code pane in the Personal Macro Workbook, follow these steps:
- Press Alt+F11 or select Developer, Visual Basic. If you have never used macros before, you see a menu bar, a toolbar, and a lot of gray.
- Press Ctrl+R or select View, Project Explorer to show the Project Explorer pane. As shown in Figure 99, the Project Explorer lists each open workbook, plus one workbook for each standard add-in installed on your computer. Figure 99 shows the workbooks in collapsed mode. You might find that some of your workbooks have been expanded to show worksheets and modules.
- Use the + sign next to PERSONAL.XLS to expand the tree view. Click the + sign next to Modules to see a list of modules. If you just recorded your first macro, you only see Module1. If you record more macros, Excel adds new modules, such as Module2, Module3, and so on (Figure 100).
- To see the code in any module, double-click the module in the Project Explorer. Alternatively, right-click the module and choose View Code.
If you want to run a macro from this book, you can type or paste it in any existing module in PERSONAL.XLS. Note that after you change code in PERSONAL. XLS and then you close Excel, you are prompted about whether you want to save your changes to PERSONAL.XLS. Don’t forget to save at this point!
Summary: Several code samples in this book are appropriate for the Personal Macro Workbook. By following the steps in this selection, you can create the Personal Macro Workbook.
Title Photo: Phillip Glickman on Unsplash
This article is an excerpt from Excel Gurus Gone Wild.
