Compare Sheets Side by Side
July 18, 2017 - by Bill Jelen
Paste Special Transpose does a snapshot of the data.
This feature appeared in Excel 2003 with very little fanfare. Say that you have two workbooks that you want to compare side by side. You aren't looking for a VLOOKUP, but just want to “eyeball” the two workbooks. Open both workbooks. On the View tab, choose View Side by Side.
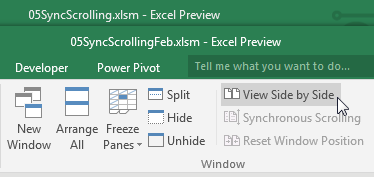
For whatever reason, Excel defaults to arranging the first workbook in the top half of the screen and the second workbook in the bottom half of the screen, which clearly means that someone on the Excel team does not know the meaning of “Side by Side.”
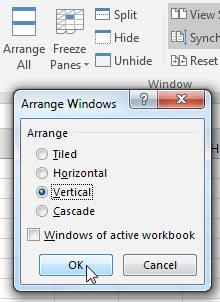
The command doesn't say, “View One Above the Other,” does it? While this choice annoys me, it is easy enough to truly get them side by side: Just select View, Arrange All, Vertical, OK.
At this point, one workbook is on the left half of your monitor, and the other workbook is on the right half. I have this monster 1080p monitor, which means that each workbook is only taking up a quarter of the screen real estate. So, for those of you with monitors more than twice as wide as your worksheet, hover over the right edge of the left workbook. You will see the mouse pointer below. Click and drag left.

Then drag the left edge of the right workbook to the left.
You end up with this arrangement of the two workbooks:

But this is nothing new. Excel 97 offered Arrange All Vertical. There is the big difference, though:
Grab the scrollbar and scroll the right workbook down so it starts at row 8. Miraculously, the left workbook scrolls at the same rate, and both workbooks are showing row 8 through 17.
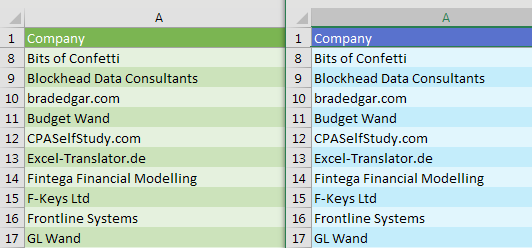
This is great, until one workbook adds or deletes a row.
Then, things are out of sync. The Harlem Globetrotters were added on the left, so now we need row 19 on the left and row 18 on the right to scroll together.
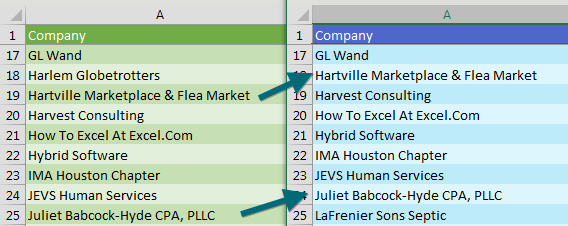
The key is to temporarily turn off Synchronous Scrolling. This was turned on when you used View Side by Side. It is in the View tab, in the Window group, but these three icons collapse when the Excel window narrows, so you are likely to only see the icons, and not the words.

Turn off Synchronous Scrolling. Get the two workbooks lined up again. Turn on Synchronous Scrolling. As shown below, row 26 on the left is matched with row 25 on the right.
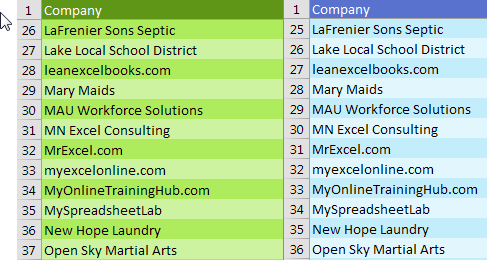
As you continue to scroll, the rows will remain lined up.

Can I Compare Sheet1 and Sheet2 of the Same Workbook?
Yes. Make sure you only have one workbook open. From the View tab, select New Window. It now appears that you have two workbooks open. One has :1 in the title bar, and one has :2 in the title bar. Select Sheet1 in :1 and Sheet2 in :2. Follow the View Side by Side steps from above. You will now be able to see both worksheets of the workbook side by side. When you are done, go to the :2 version of the file and click the X in the top right to close that window.
Note
You have not opened a second copy of the workbook. Think of the :2 as a second camera pointed at a different section of the workbook.
Thanks to Anne Walsh, author of Your Excel Survival Kit, for suggesting this feature.
Watch Video
Title Photo: Martin Harry / pixabay
