Hi All,
I'm wondering if anyone can help with vba code for exporting selected sheets to a PDF format from a open workbook. I have made a daily log for work and it is titled the date and then day / night (for ex 13/09/21 Day or 13/09/21 Night) and then this workbook contains four worksheets (named Duty Team, Daily Log Report, Closures & Handover) I would need to export to a PDF format which would also have the same file name as the corresponding workbook.
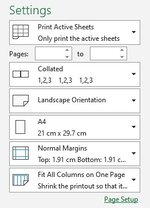
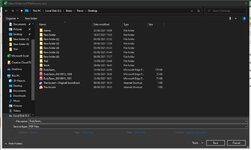
I would like the PDF export to use the print settings "Landscape orientation" and "Fit All Columns on One Page" so that each of these worksheets fits on one PDF page in width. I have recorded a macro which does this and it works but the only caveat is that the macro recording wants a filename (at the moment set to "Shift"). Is there any way I can achieve the same outcome but when the PDF exports it names itself after the excel workbooks filename? Im more than happy for the PDF export to save in the same folder as the original excel file.
Many thanks all.
T
The macro has produced the vba coding of...
Sub PDFExport()
'
' PDFExport Macro
'
'
Sheets(Array("Duty Team", "Daily Log Report", "Closures", "Handover")).Select
Sheets("Duty Team").Activate
Application.PrintCommunication = False
With ActiveSheet.PageSetup
.LeftHeader = ""
.CenterHeader = ""
.RightHeader = ""
.LeftFooter = ""
.CenterFooter = ""
.RightFooter = ""
.LeftMargin = Application.InchesToPoints(0.7)
.RightMargin = Application.InchesToPoints(0.7)
.TopMargin = Application.InchesToPoints(0.75)
.BottomMargin = Application.InchesToPoints(0.75)
.HeaderMargin = Application.InchesToPoints(0.3)
.FooterMargin = Application.InchesToPoints(0.3)
.PrintHeadings = False
.PrintGridlines = False
.PrintComments = xlPrintNoComments
.PrintQuality = 600
.CenterHorizontally = False
.CenterVertically = False
.Orientation = xlLandscape
.Draft = False
.PaperSize = xlPaperA4
.FirstPageNumber = xlAutomatic
.Order = xlDownThenOver
.BlackAndWhite = False
.Zoom = 100
.PrintErrors = xlPrintErrorsDisplayed
.OddAndEvenPagesHeaderFooter = False
.DifferentFirstPageHeaderFooter = False
.ScaleWithDocHeaderFooter = True
.AlignMarginsHeaderFooter = True
.EvenPage.LeftHeader.Text = ""
.EvenPage.CenterHeader.Text = ""
.EvenPage.RightHeader.Text = ""
.EvenPage.LeftFooter.Text = ""
.EvenPage.CenterFooter.Text = ""
.EvenPage.RightFooter.Text = ""
.FirstPage.LeftHeader.Text = ""
.FirstPage.CenterHeader.Text = ""
.FirstPage.RightHeader.Text = ""
.FirstPage.LeftFooter.Text = ""
.FirstPage.CenterFooter.Text = ""
.FirstPage.RightFooter.Text = ""
End With
Application.PrintCommunication = True
Application.PrintCommunication = False
With ActiveSheet.PageSetup
.LeftHeader = ""
.CenterHeader = ""
.RightHeader = ""
.LeftFooter = ""
.CenterFooter = ""
.RightFooter = ""
.LeftMargin = Application.InchesToPoints(0.7)
.RightMargin = Application.InchesToPoints(0.7)
.TopMargin = Application.InchesToPoints(0.75)
.BottomMargin = Application.InchesToPoints(0.75)
.HeaderMargin = Application.InchesToPoints(0.3)
.FooterMargin = Application.InchesToPoints(0.3)
.PrintHeadings = False
.PrintGridlines = False
.PrintComments = xlPrintNoComments
.PrintQuality = 600
.CenterHorizontally = False
.CenterVertically = False
.Orientation = xlLandscape
.Draft = False
.PaperSize = xlPaperA4
.FirstPageNumber = xlAutomatic
.Order = xlDownThenOver
.BlackAndWhite = False
.Zoom = False
.FitToPagesWide = 1
.FitToPagesTall = 0
.PrintErrors = xlPrintErrorsDisplayed
.OddAndEvenPagesHeaderFooter = False
.DifferentFirstPageHeaderFooter = False
.ScaleWithDocHeaderFooter = True
.AlignMarginsHeaderFooter = True
.EvenPage.LeftHeader.Text = ""
.EvenPage.CenterHeader.Text = ""
.EvenPage.RightHeader.Text = ""
.EvenPage.LeftFooter.Text = ""
.EvenPage.CenterFooter.Text = ""
.EvenPage.RightFooter.Text = ""
.FirstPage.LeftHeader.Text = ""
.FirstPage.CenterHeader.Text = ""
.FirstPage.RightHeader.Text = ""
.FirstPage.LeftFooter.Text = ""
.FirstPage.CenterFooter.Text = ""
.FirstPage.RightFooter.Text = ""
End With
Application.PrintCommunication = True
ActiveSheet.ExportAsFixedFormat Type:=xlTypePDF, Filename:= _
       "C:\Users\Trevor\Desktop\Trial\Shift.pdf", Quality:=xlQualityStandard, _
       IncludeDocProperties:=True, IgnorePrintAreas:=False, OpenAfterPublish:= _
       False
End Sub


